How to create an NFT in OpenSea Studio
OpenSea has released its platform for creating and managing NFTs. It offers a wide range of functionalities, including:
Downloading digital data and descriptions.
Creating pages for NFT projects.
Controlling the entire project creation process.
Minting tokens via credit and debit cards.
Setting permissions for purchasing tokens, and more.
Over time, additional functions will be added. For now, let's focus on how to create an NFT in OpenSea Studio.
First, navigate to the studio itself through the marketplace menu.
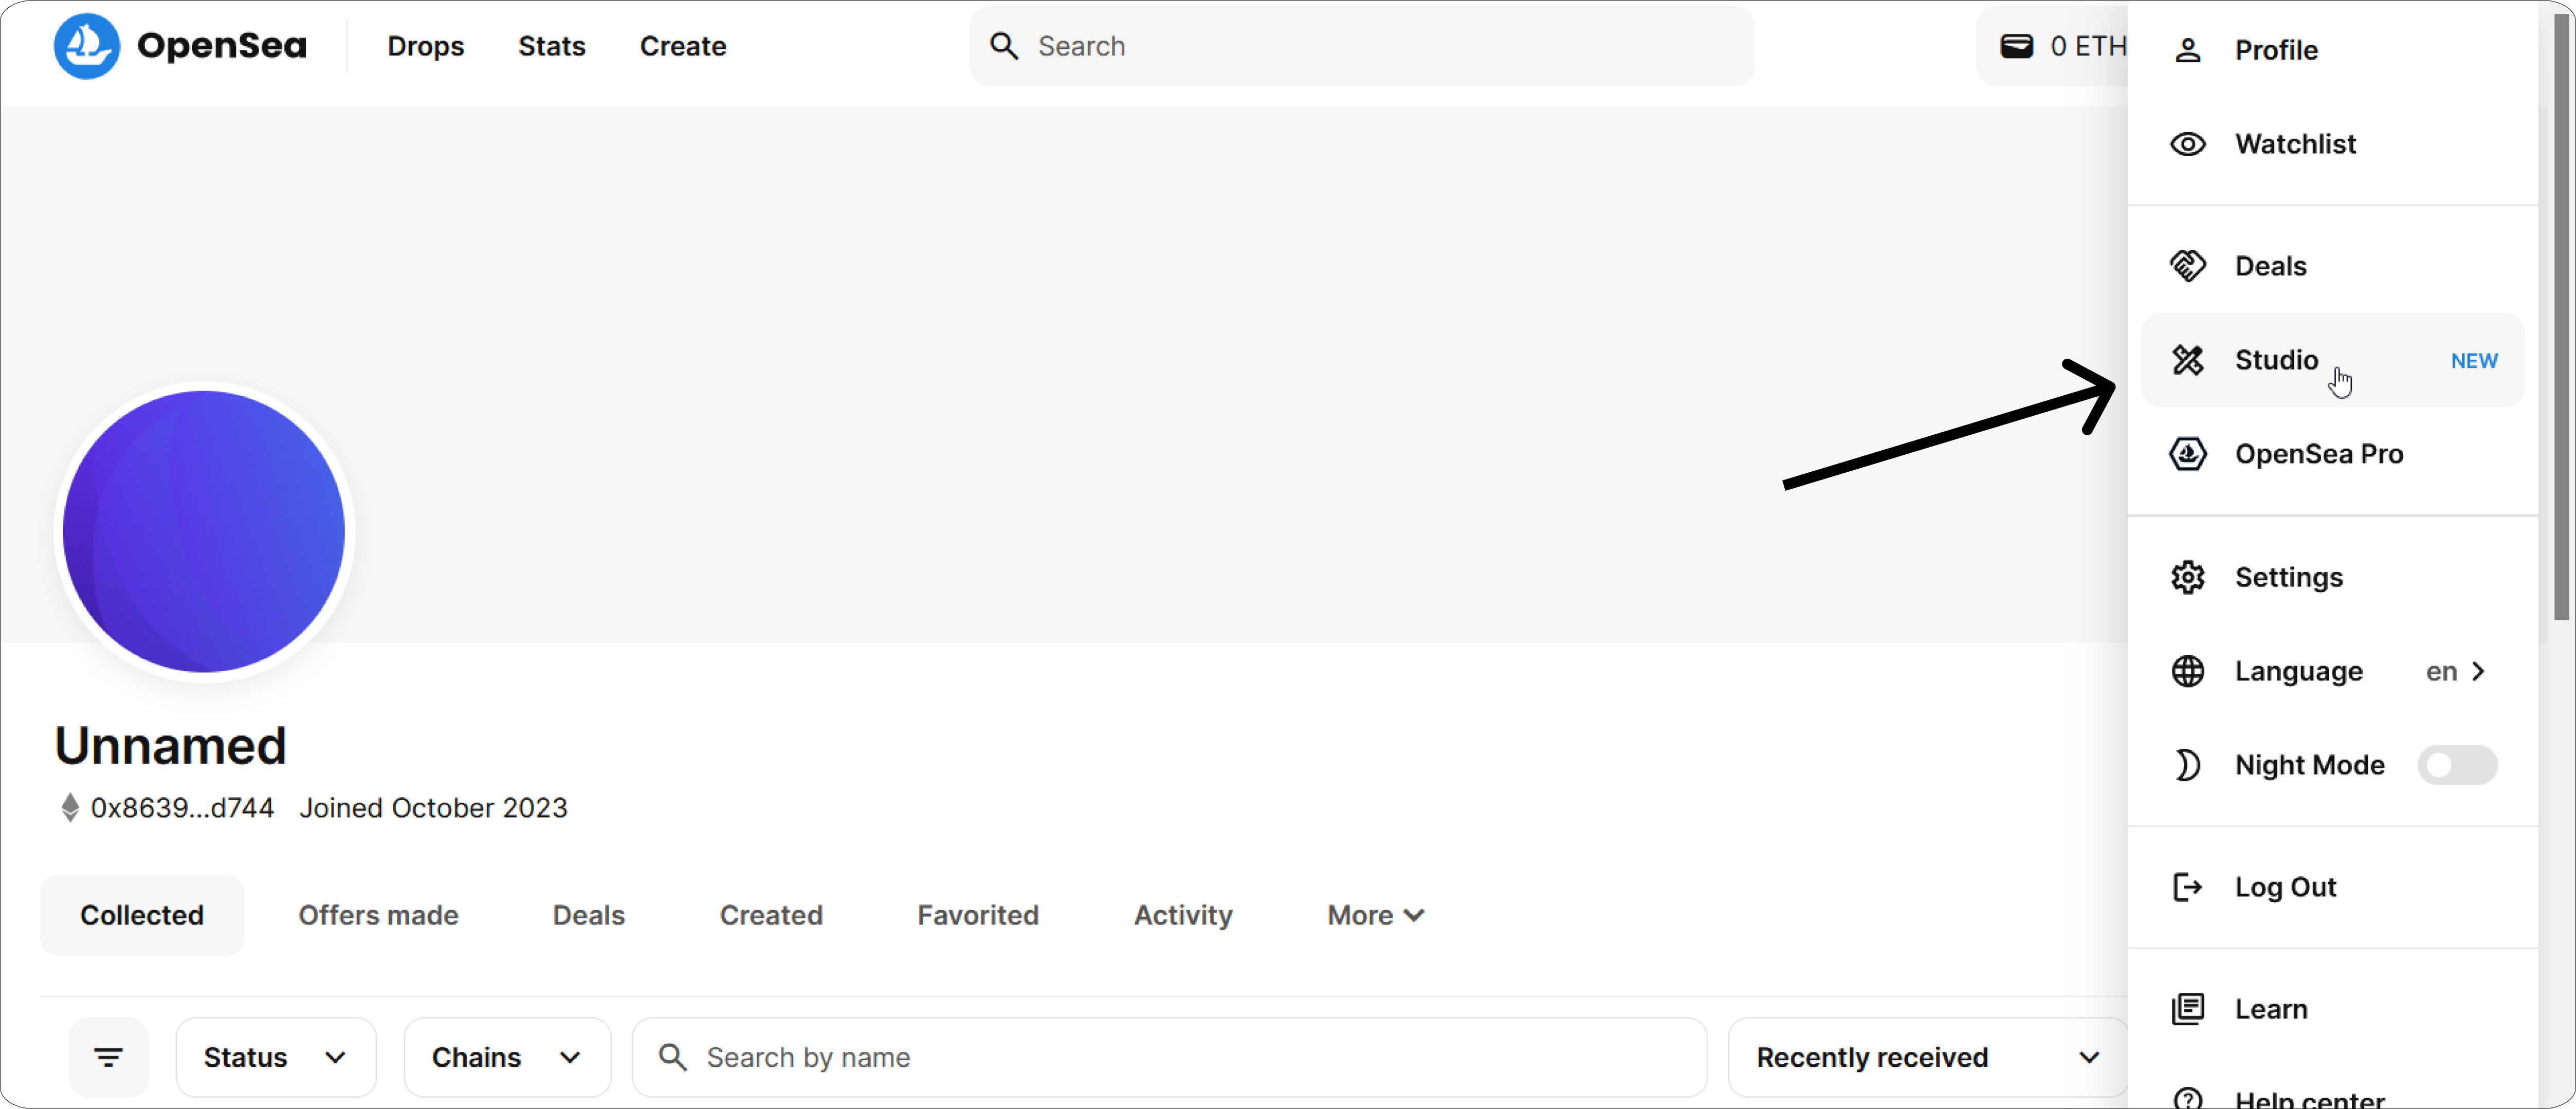
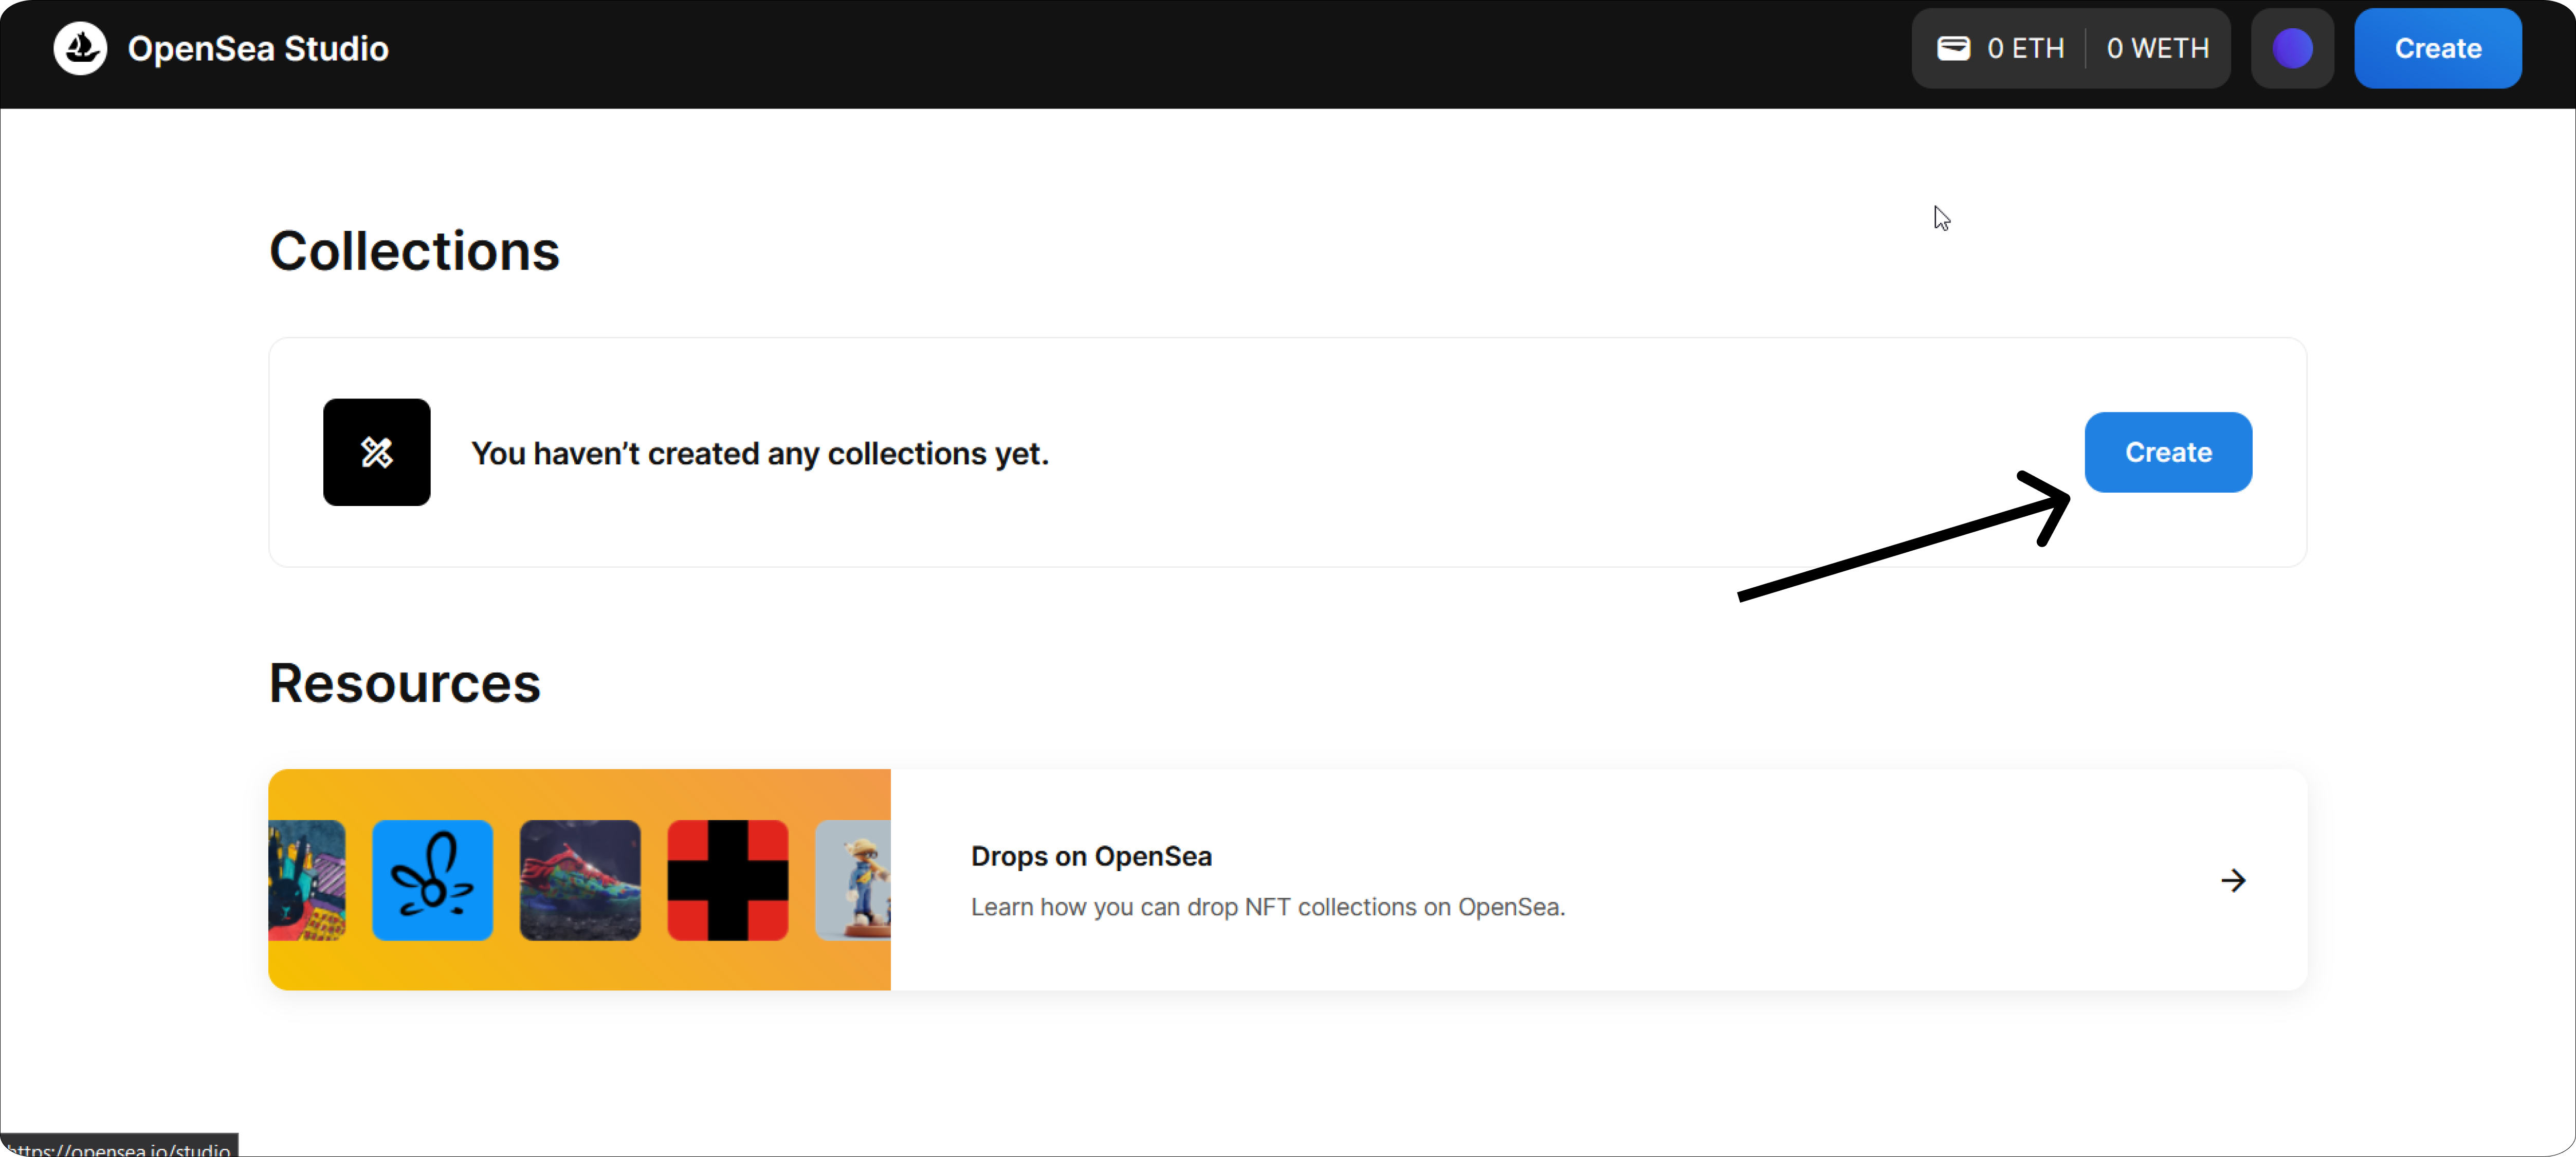
Once the studio is open, you will see two tabs: "Collections" and "Resources". For now, we don't need resources, so click on "Create".
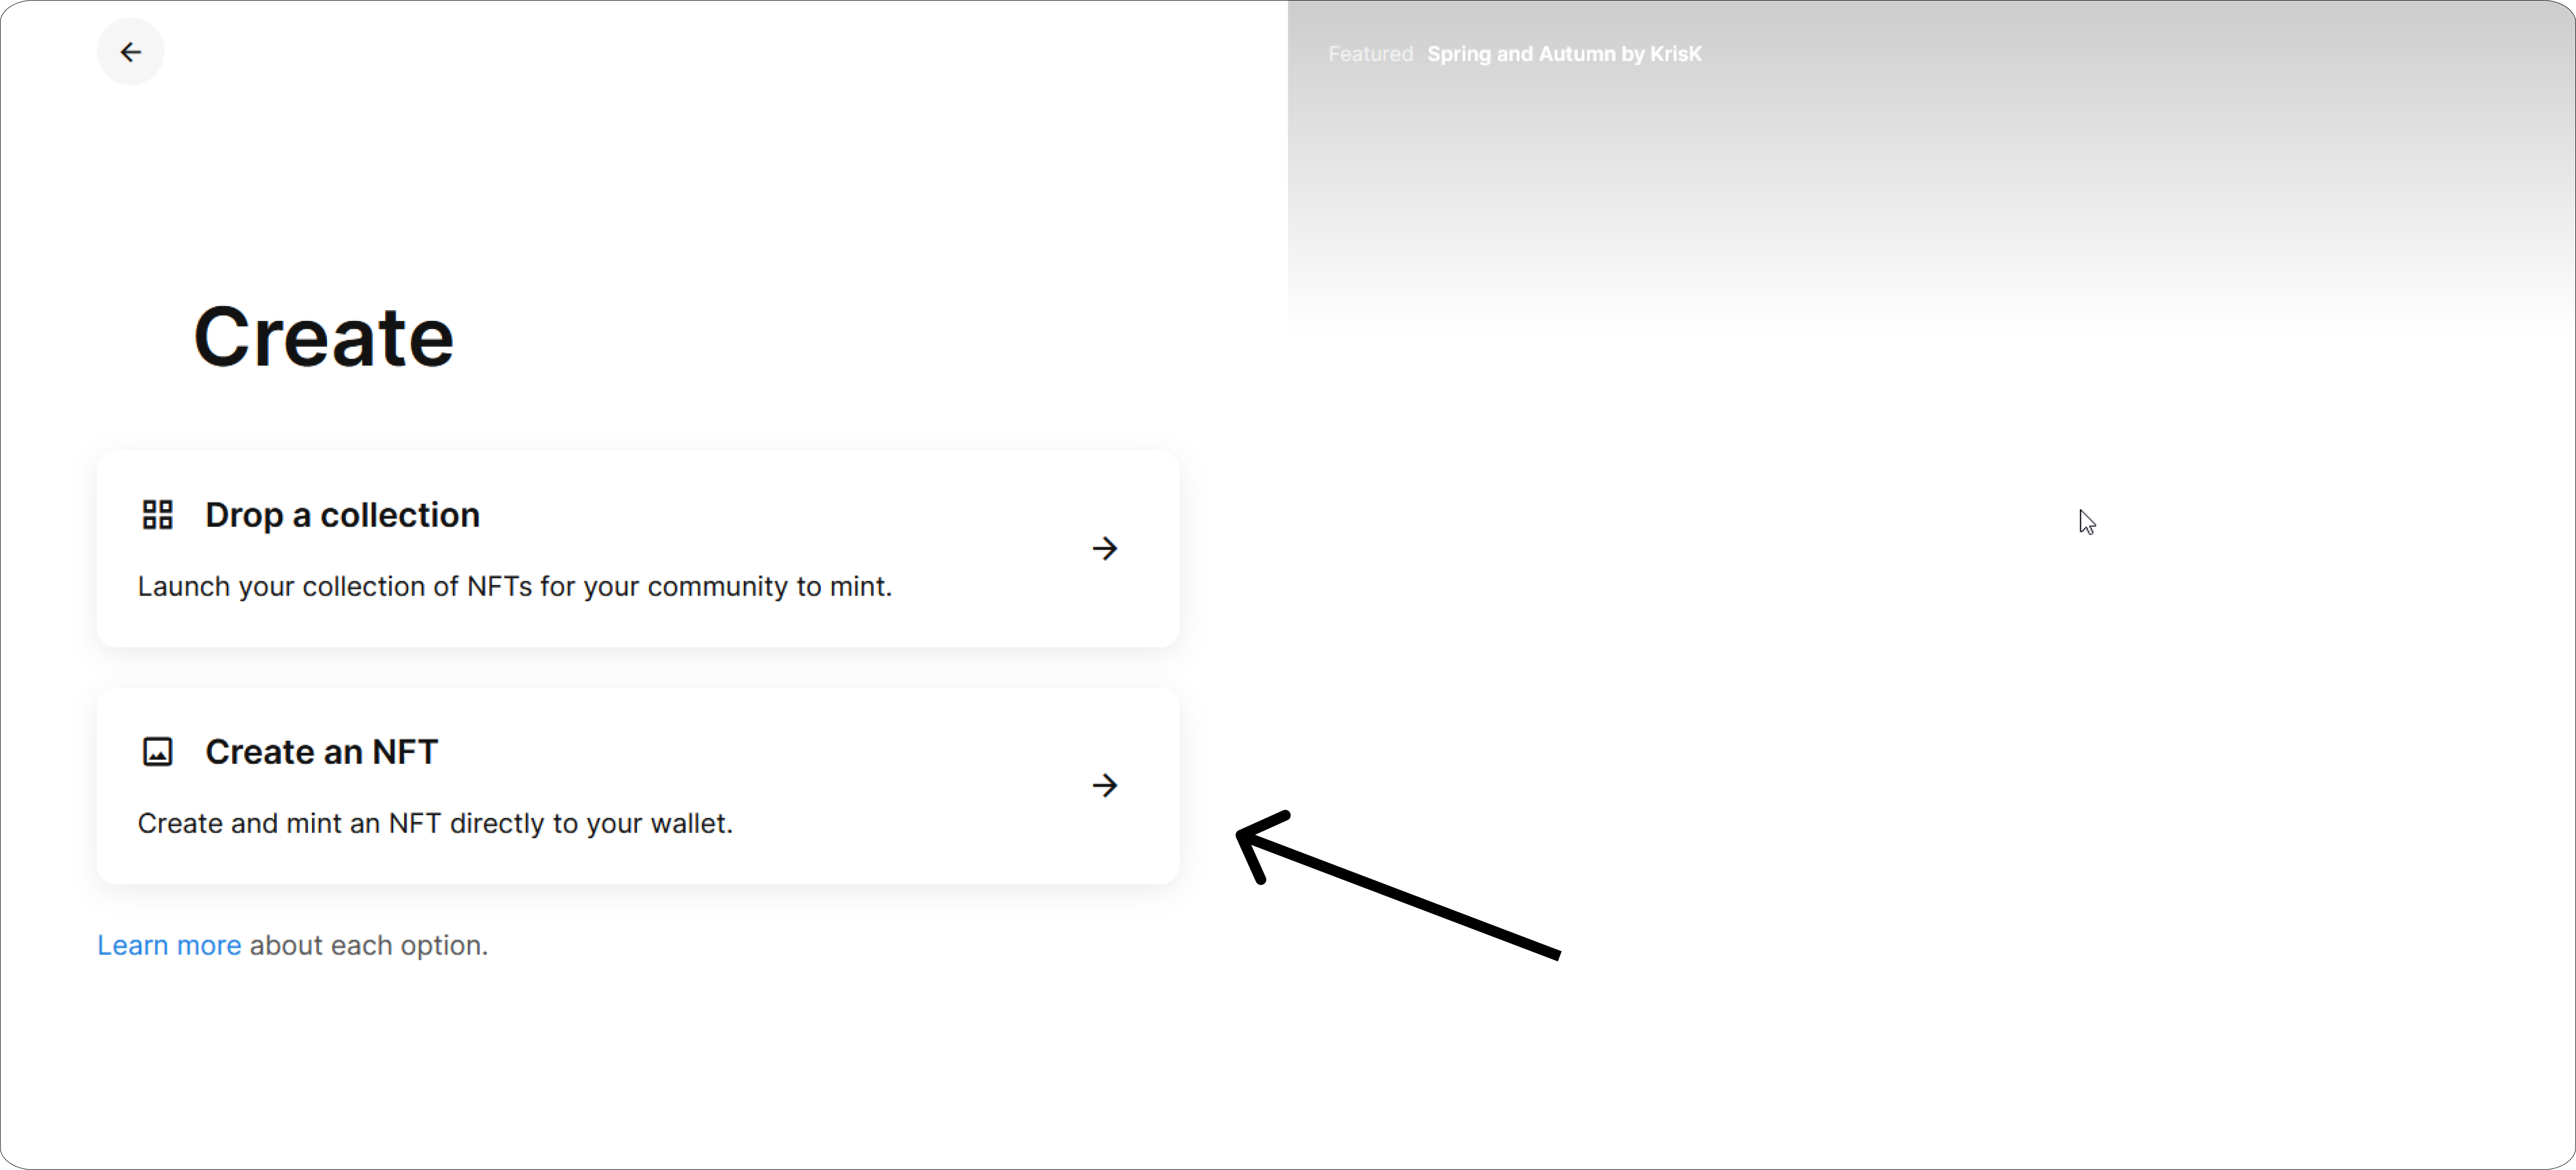
You will have the option to choose between "Drop a collection" and "Create an NFT". Since we don't have a complete collection yet, let's go to the second tab.
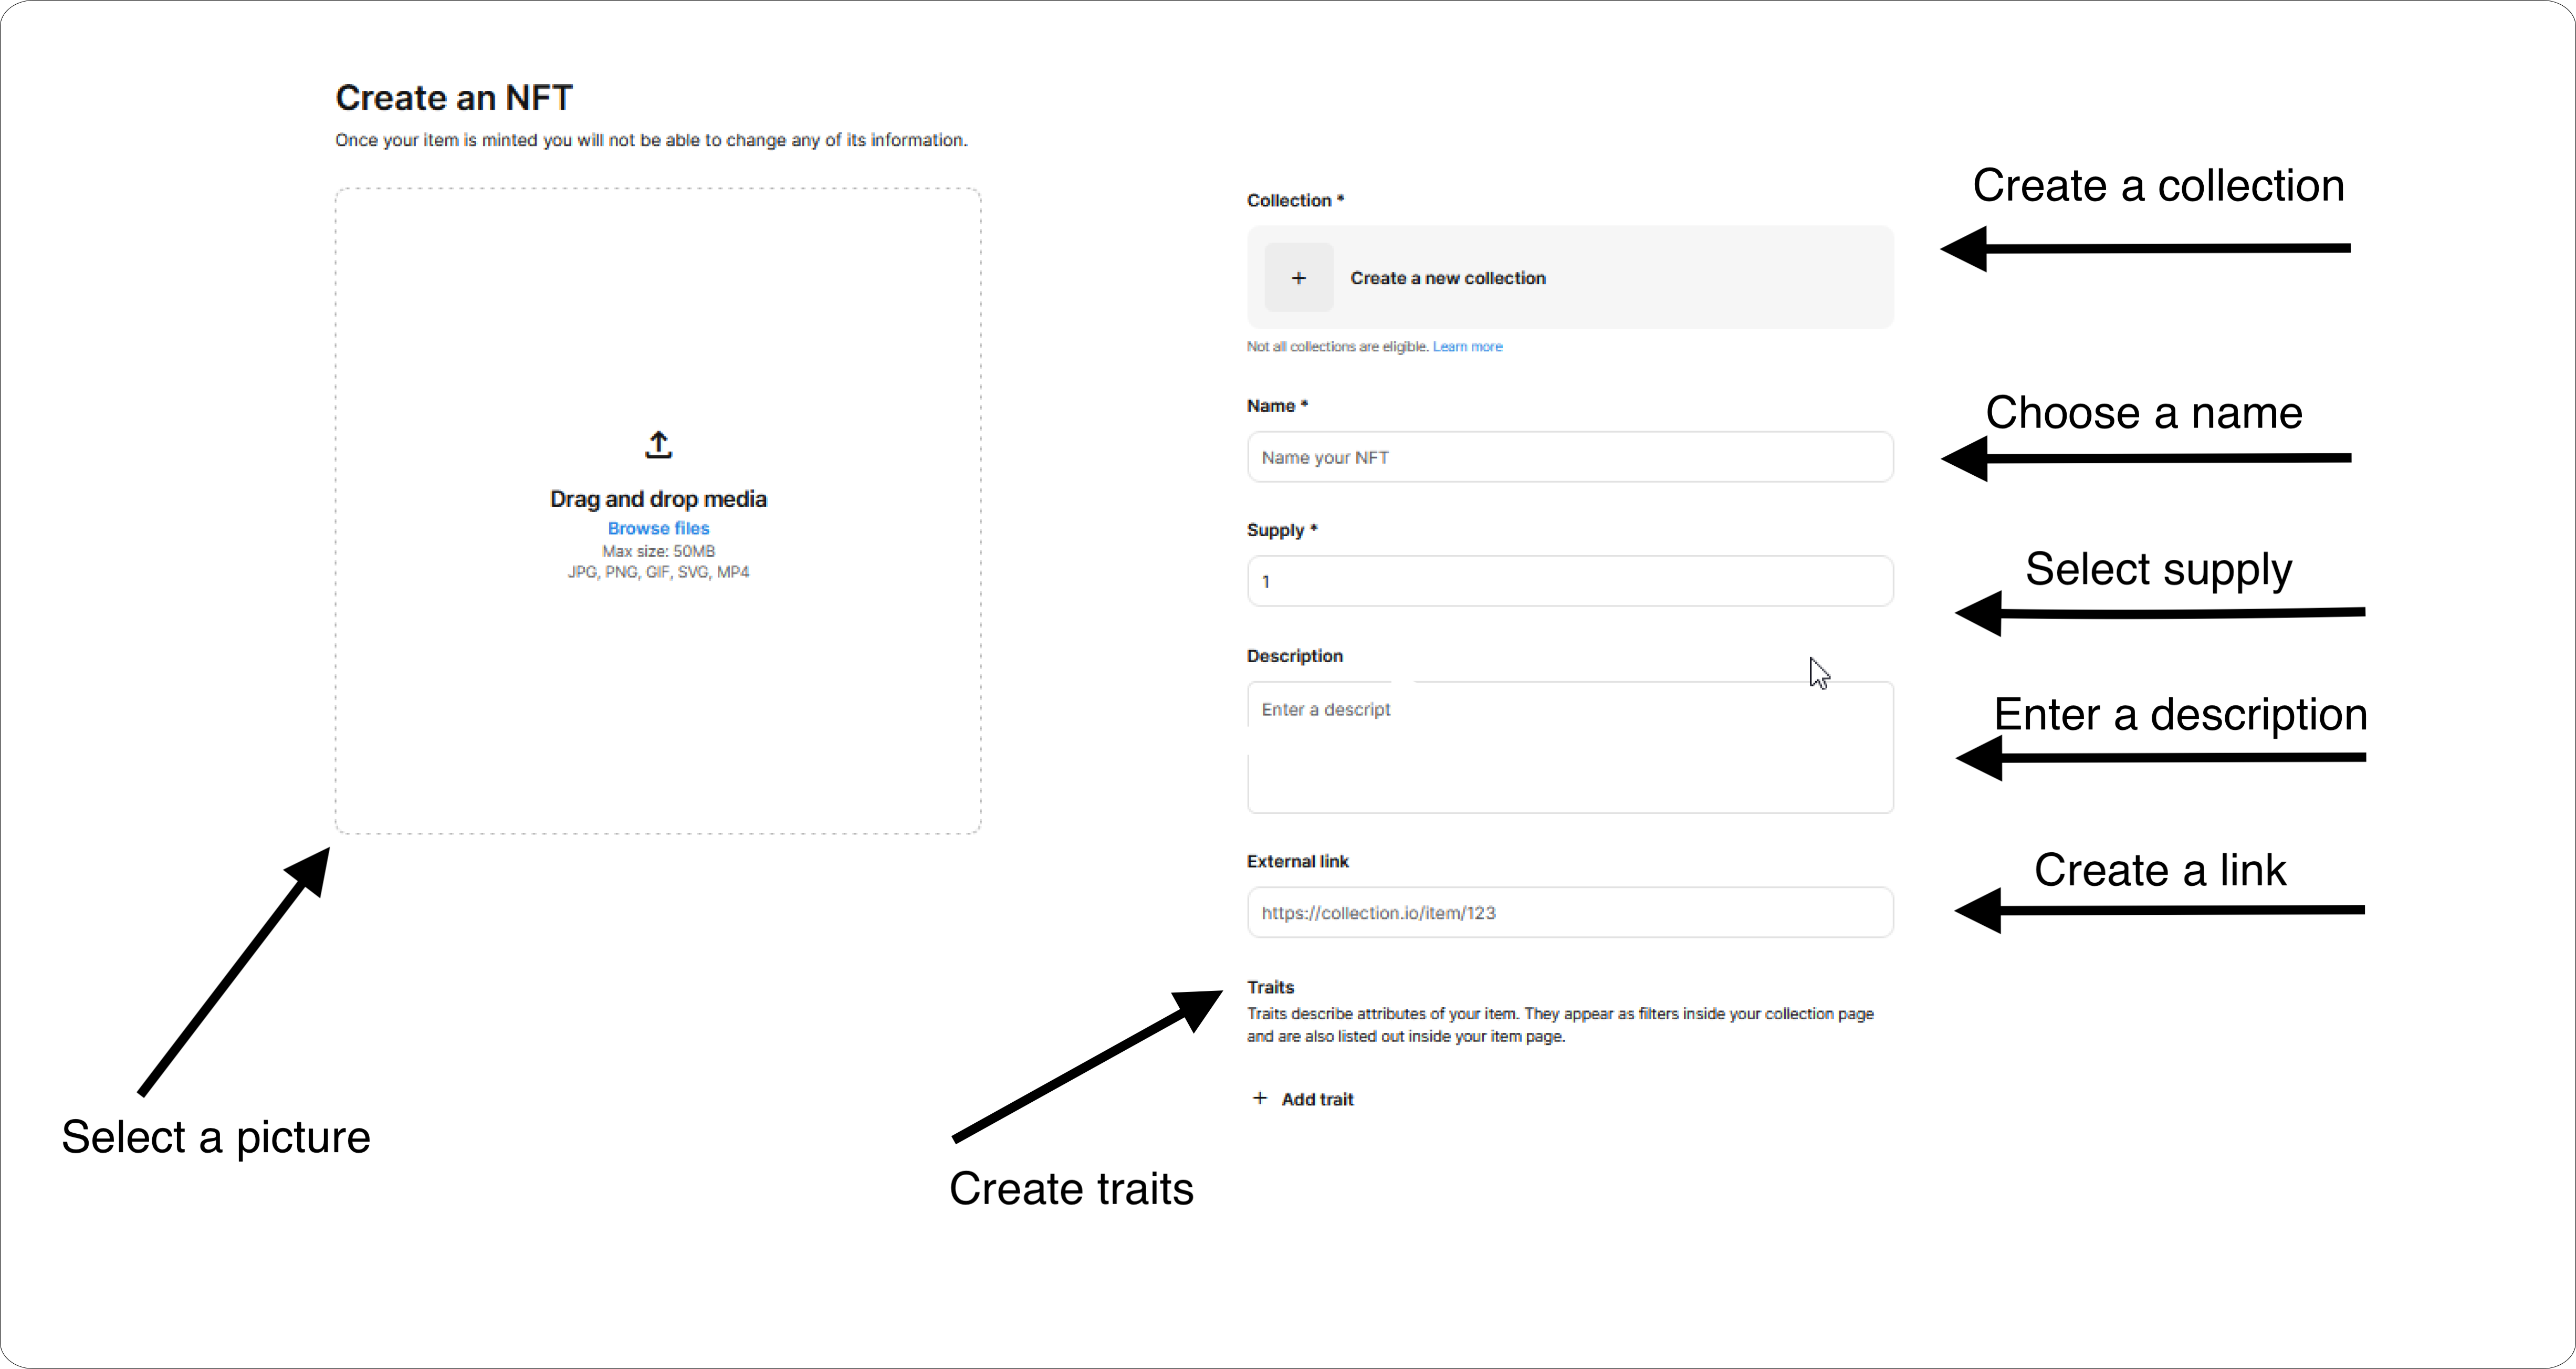
This is where the process of creating NFTs begins. Let's go through the steps one by one:
On the left, select the token image by uploading the desired image.
In the "Name" tab, provide a name for your NFT.
Select the number of tokens in the "Supply" field.
If necessary, write a description of the token in the "Description" field.
Create a link with any domain, for example, "nftbirdies.com".
Use the "Traits" section to record attributes of the NFT, such as race, color, clothing, etc. These attributes contribute to the rarity and price of the NFT.
Now, let's not forget about the "Collection" tab. Here's a breakdown of the steps:
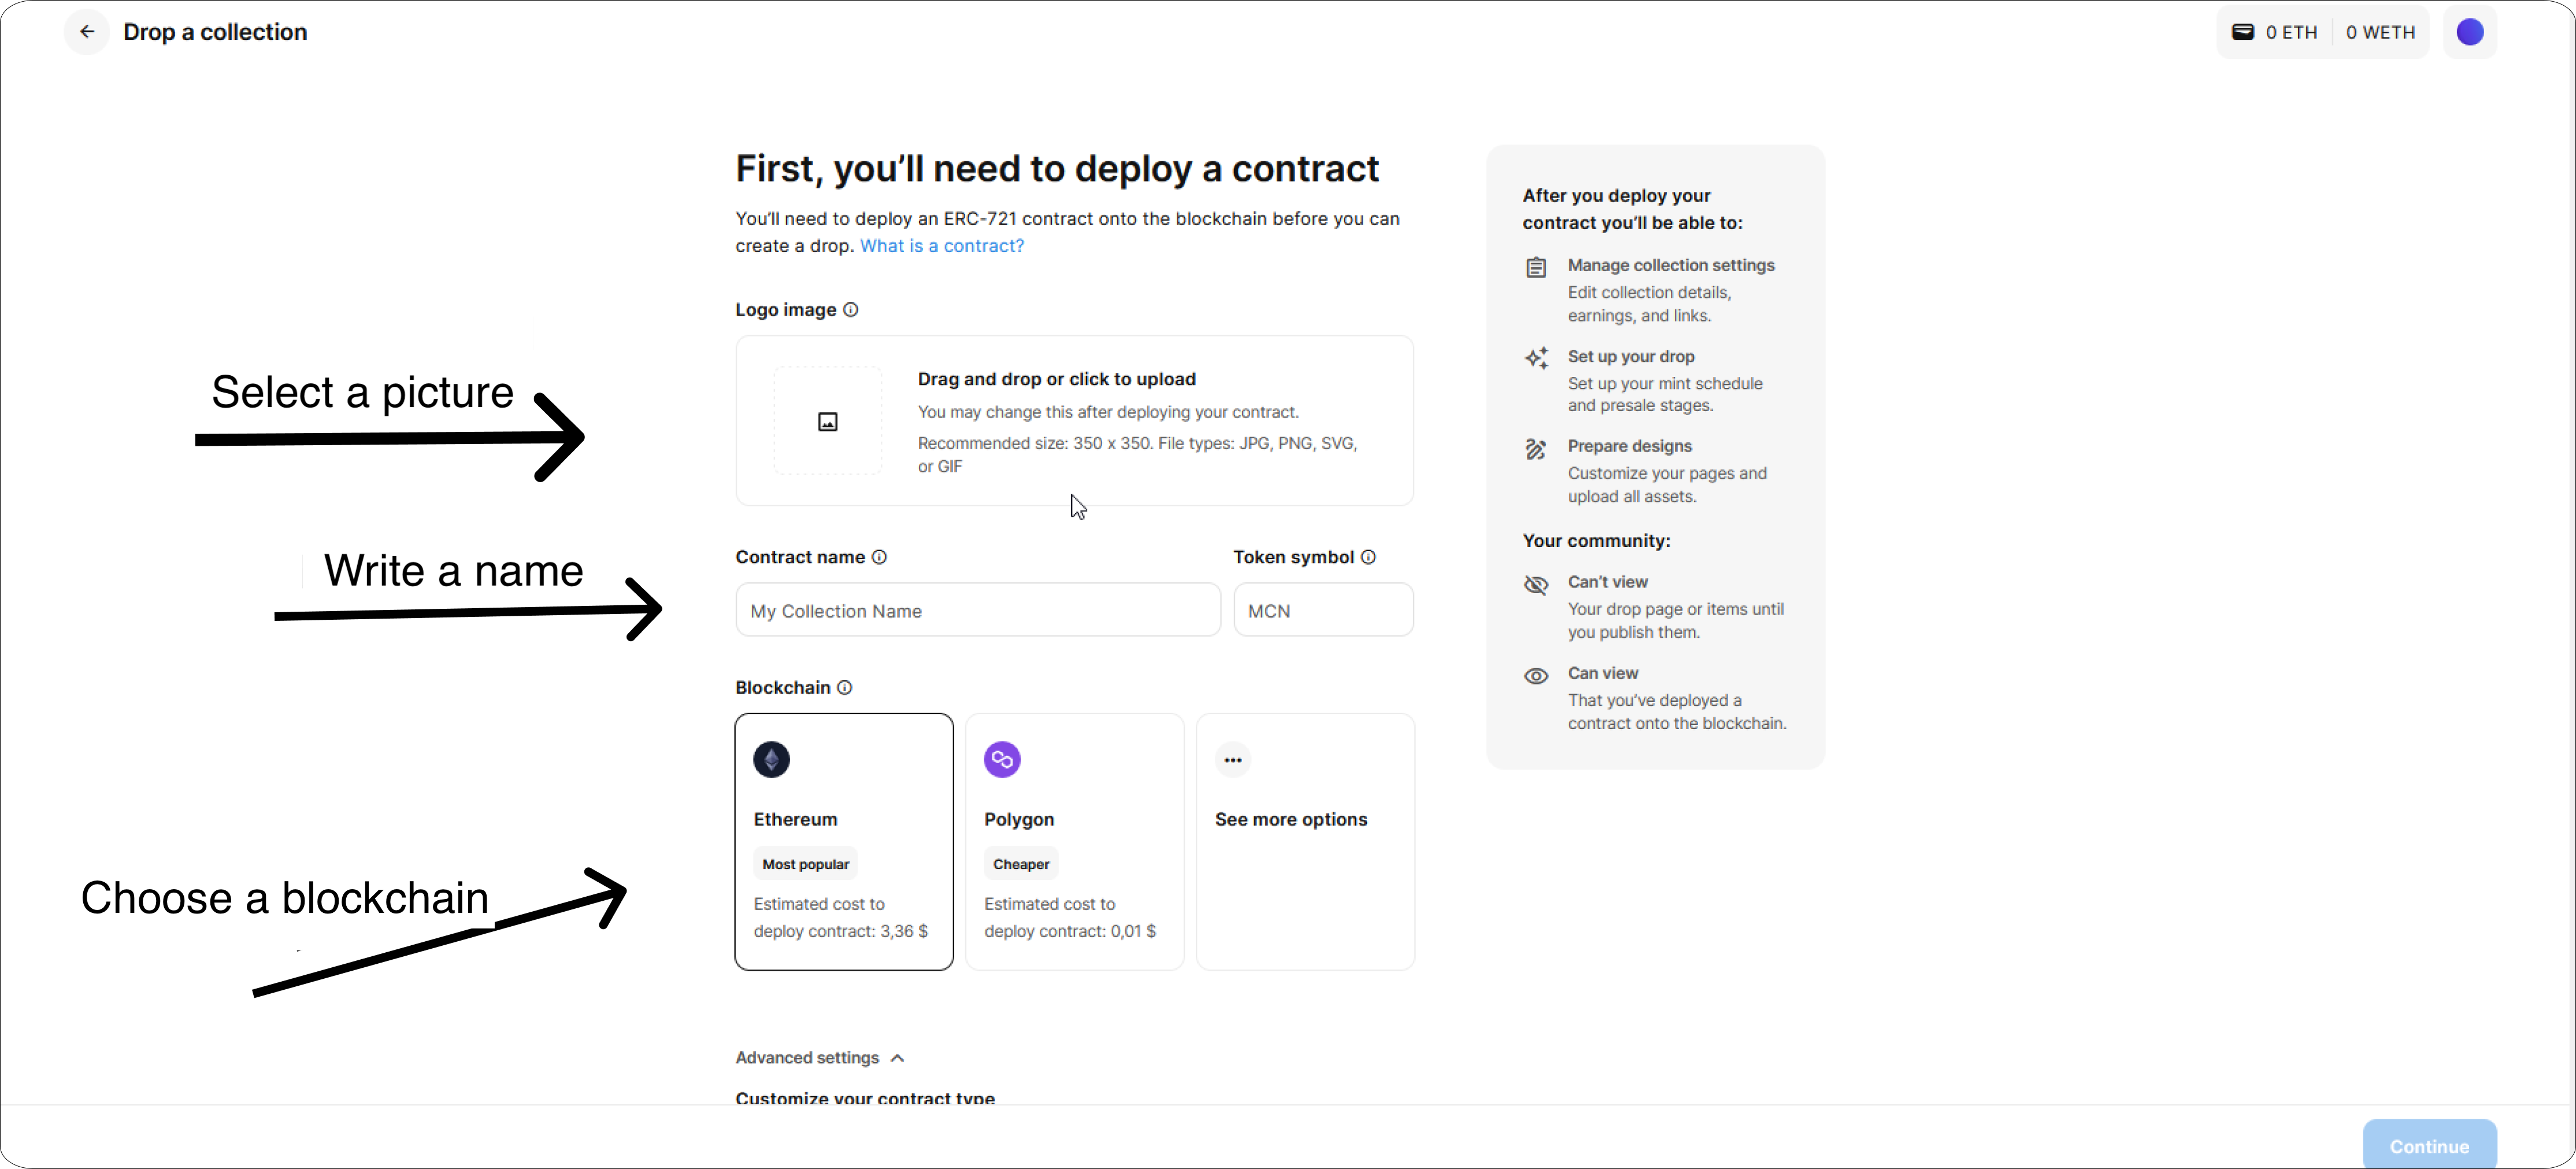
Select a picture.
Write the name of the collection in the "Contract name" field. The name of the token will be automatically configured after choosing the name of the collection.
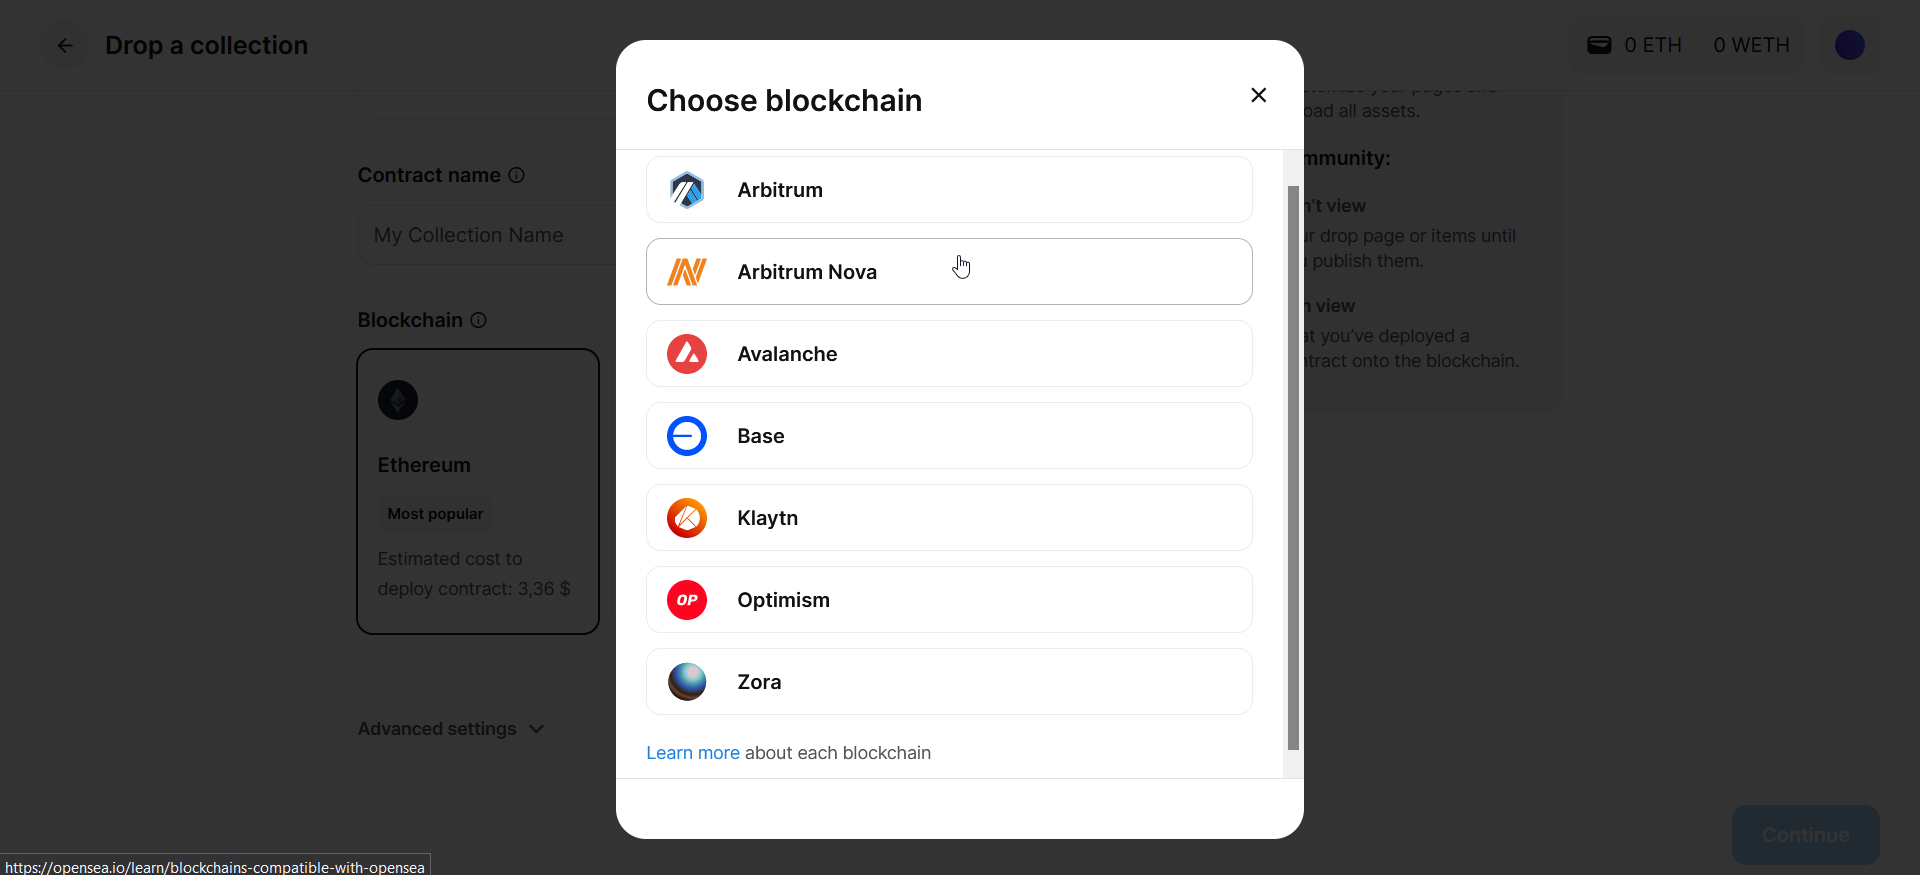
Select a blockchain. OpenSea offers 9 networks, but the main ones are the Ethereum and Polygon. If you're a beginner, we recommend creating NFTs on these blockchains.
Once the collection and NFT are ready, click "Next" to upload your work to the marketplace.
Topics
Recent comments
